Policies let you enforce deployment standards automatically. You write rules in Rego, and Octopus evaluates every deployment and runbook run against those rules before it executes. Non-compliant executions are blocked or flagged, and every evaluation is logged to the audit trail.
All policies are stored as OCL files in your Platform Hub repository. If your Platform Hub repository isn’t set up yet, see Platform Hub before continuing.
What you can enforce
When a deployment or runbook run starts, Octopus passes a structured input object to the policy engine. Your Rego conditions read from that object to decide whether the execution should proceed.
Common things teams enforce with policies:
- A manual intervention or approval step must be present in production deployments
- All packages must come from an approved branch
- Specific steps must not be skipped or disabled
- Steps must run in a particular order
- Projects and tenants must carry required tags
By default, a policy applies to both deployments and runbook runs. You can scope a policy to one or the other in your Rego. For the full list of input fields available, see the schema for policies.
If you want to jump straight to working with Rego, see the examples page. For a full guide to the Rego language, see the OPA documentation.
Build your first policy
The steps below walk through creating a policy that requires a manual intervention step in every deployment going to the Development environment for the ACME project. The walkthrough uses a non-production environment and sets the violation action to warn so you can safely verify the policy is working before extending it to production.
1. Create a policy
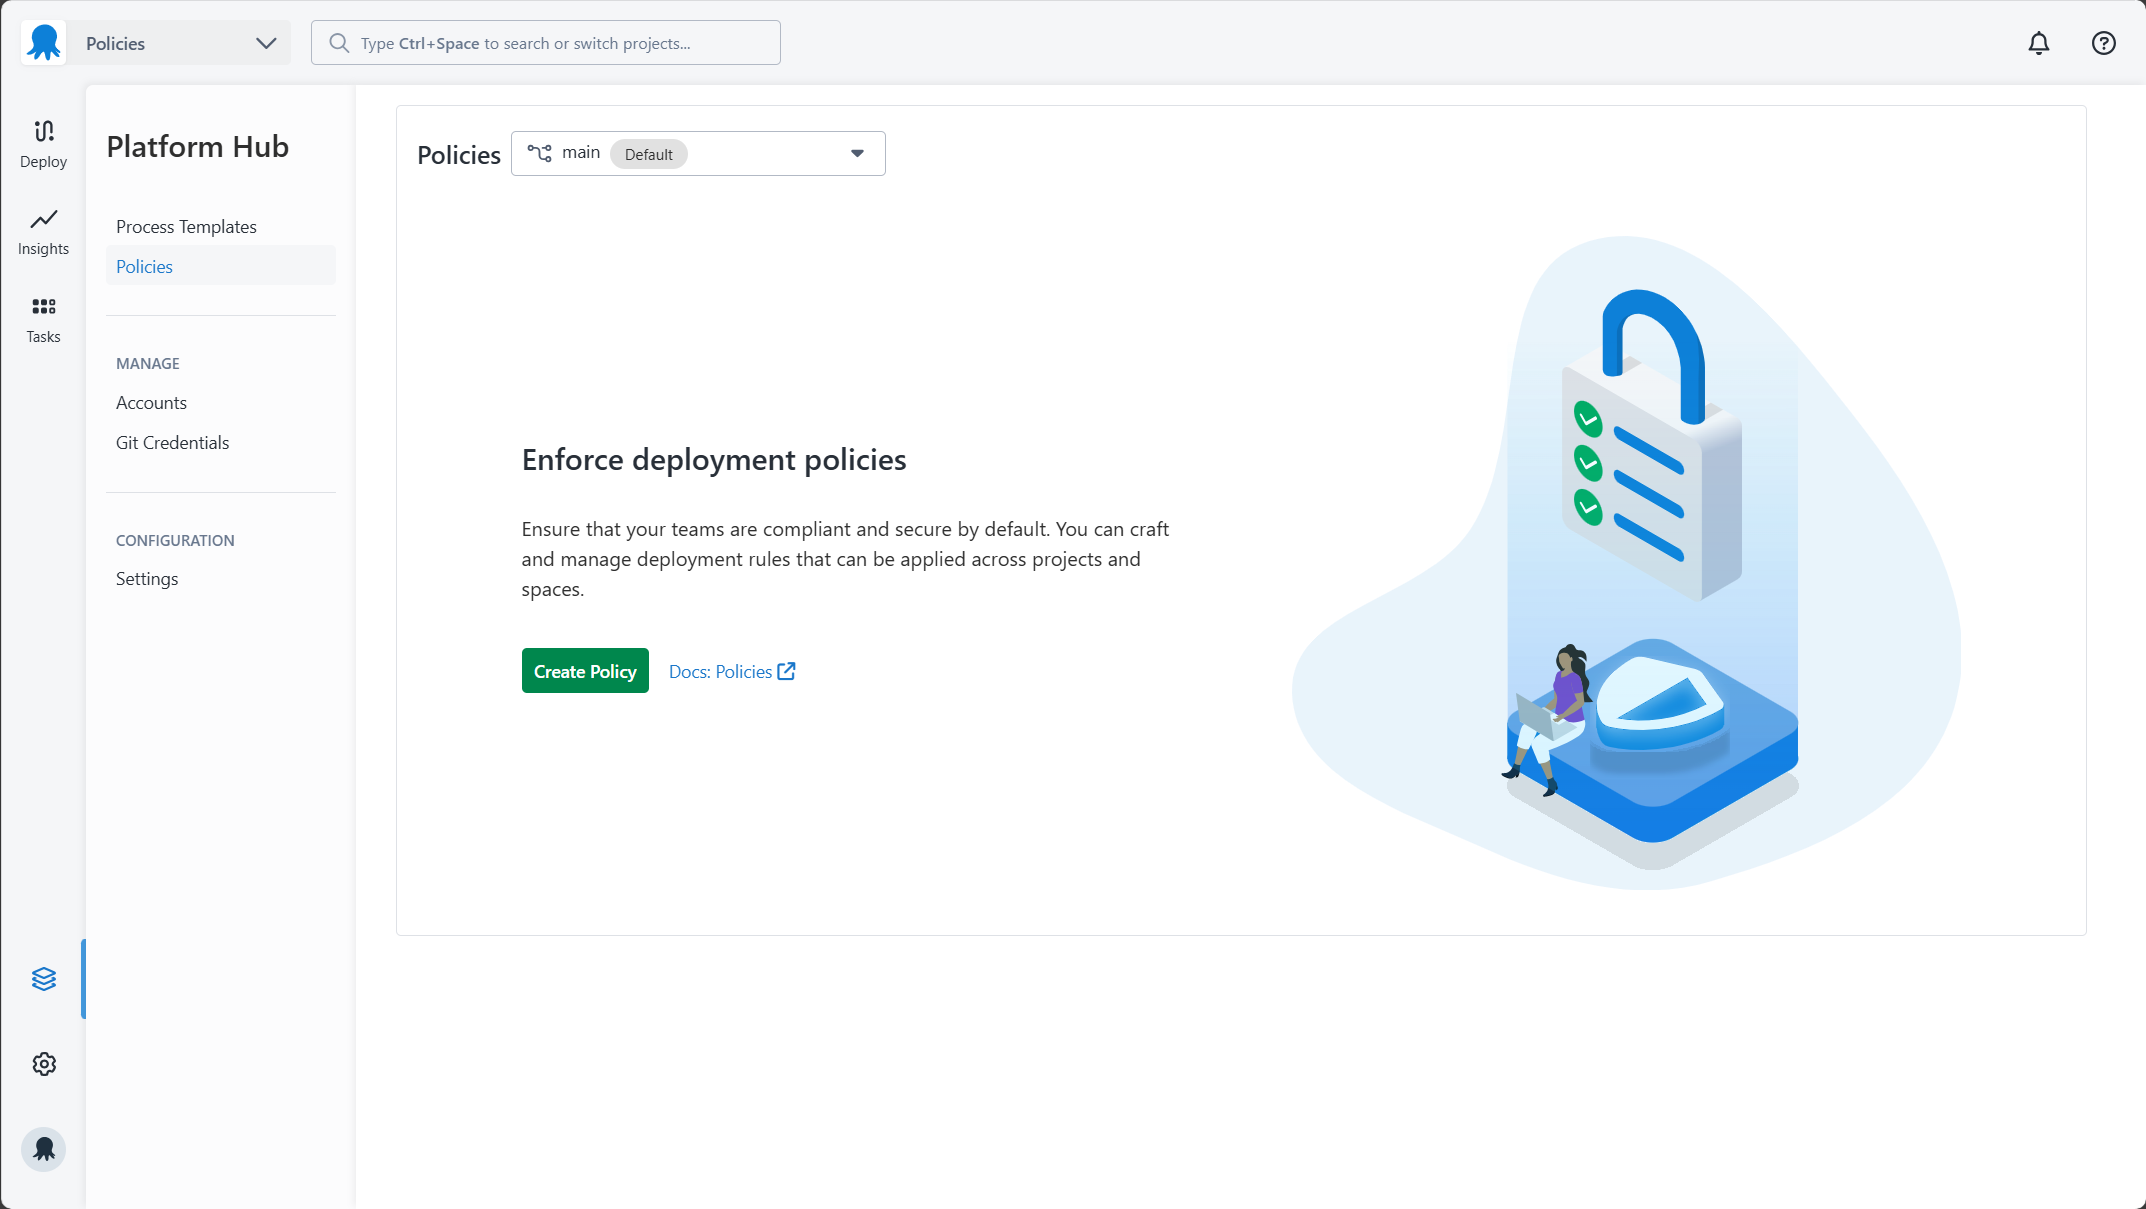
In your Octopus instance, go to Platform Hub and select Policies. Click Create Policy.
2. Select a starter policy
Choose a starter policy to base your new policy on, then click Next.
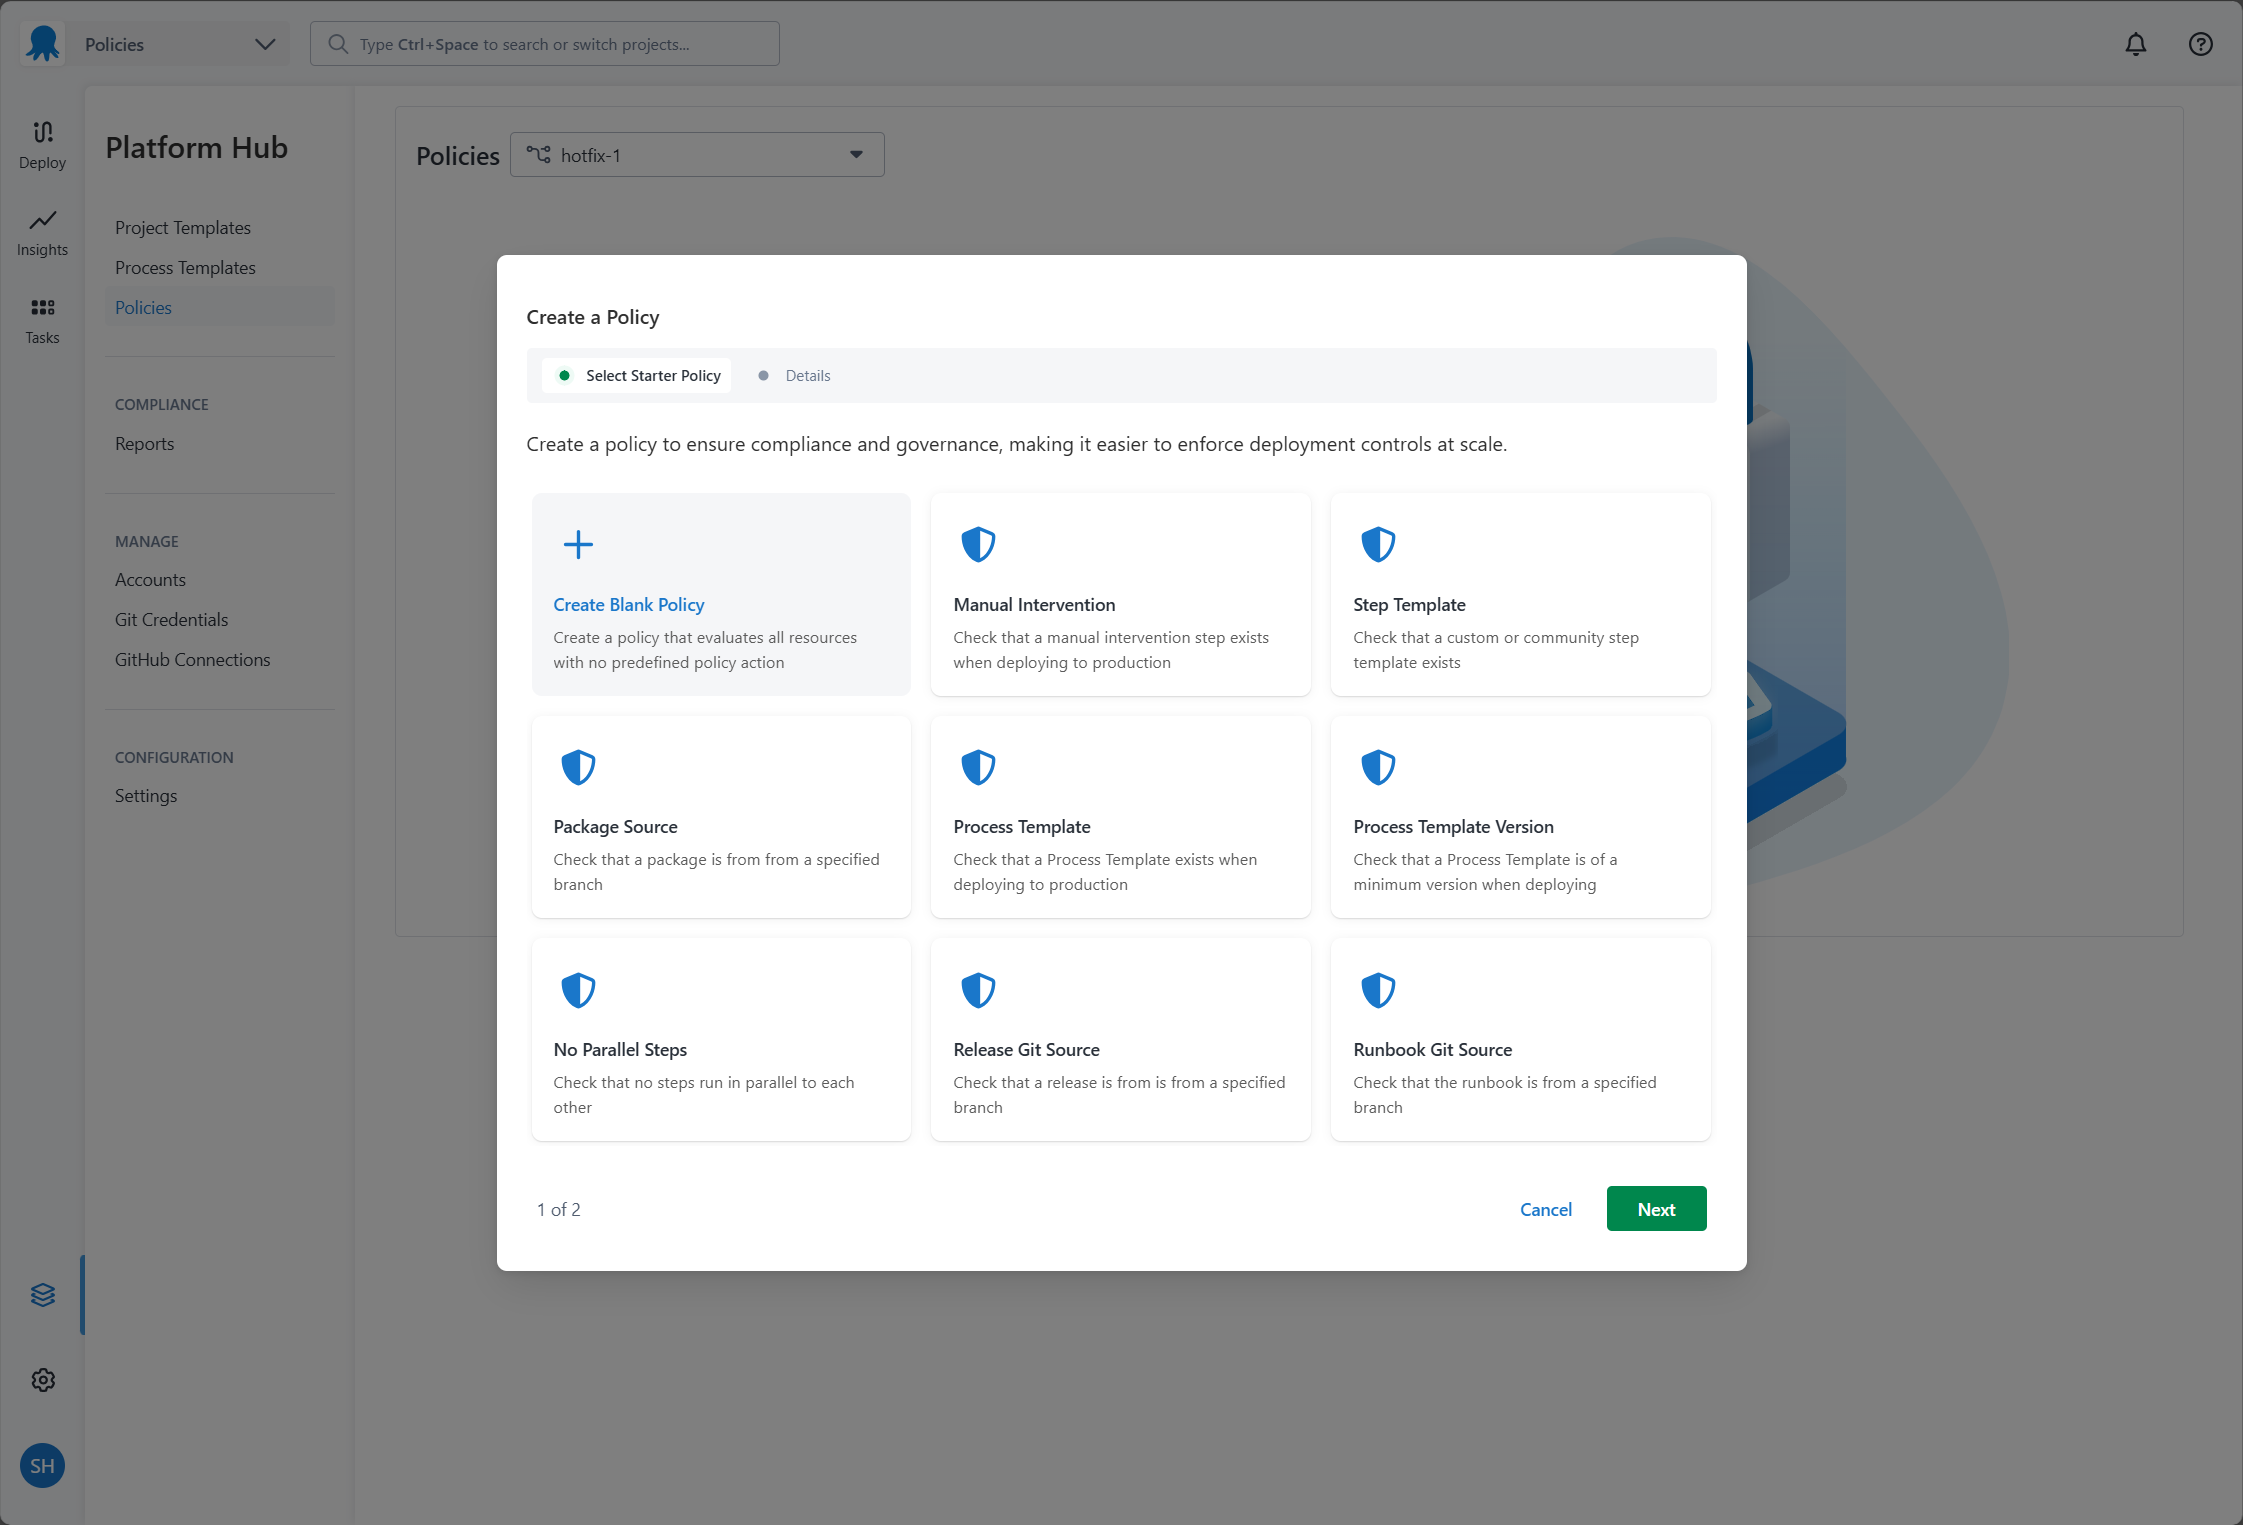
To start with a blank slate, choose Create Blank Policy.
3. Name your policy
Enter a name for your policy. Octopus generates a slug from the name you provide. You can edit the slug before clicking Done.
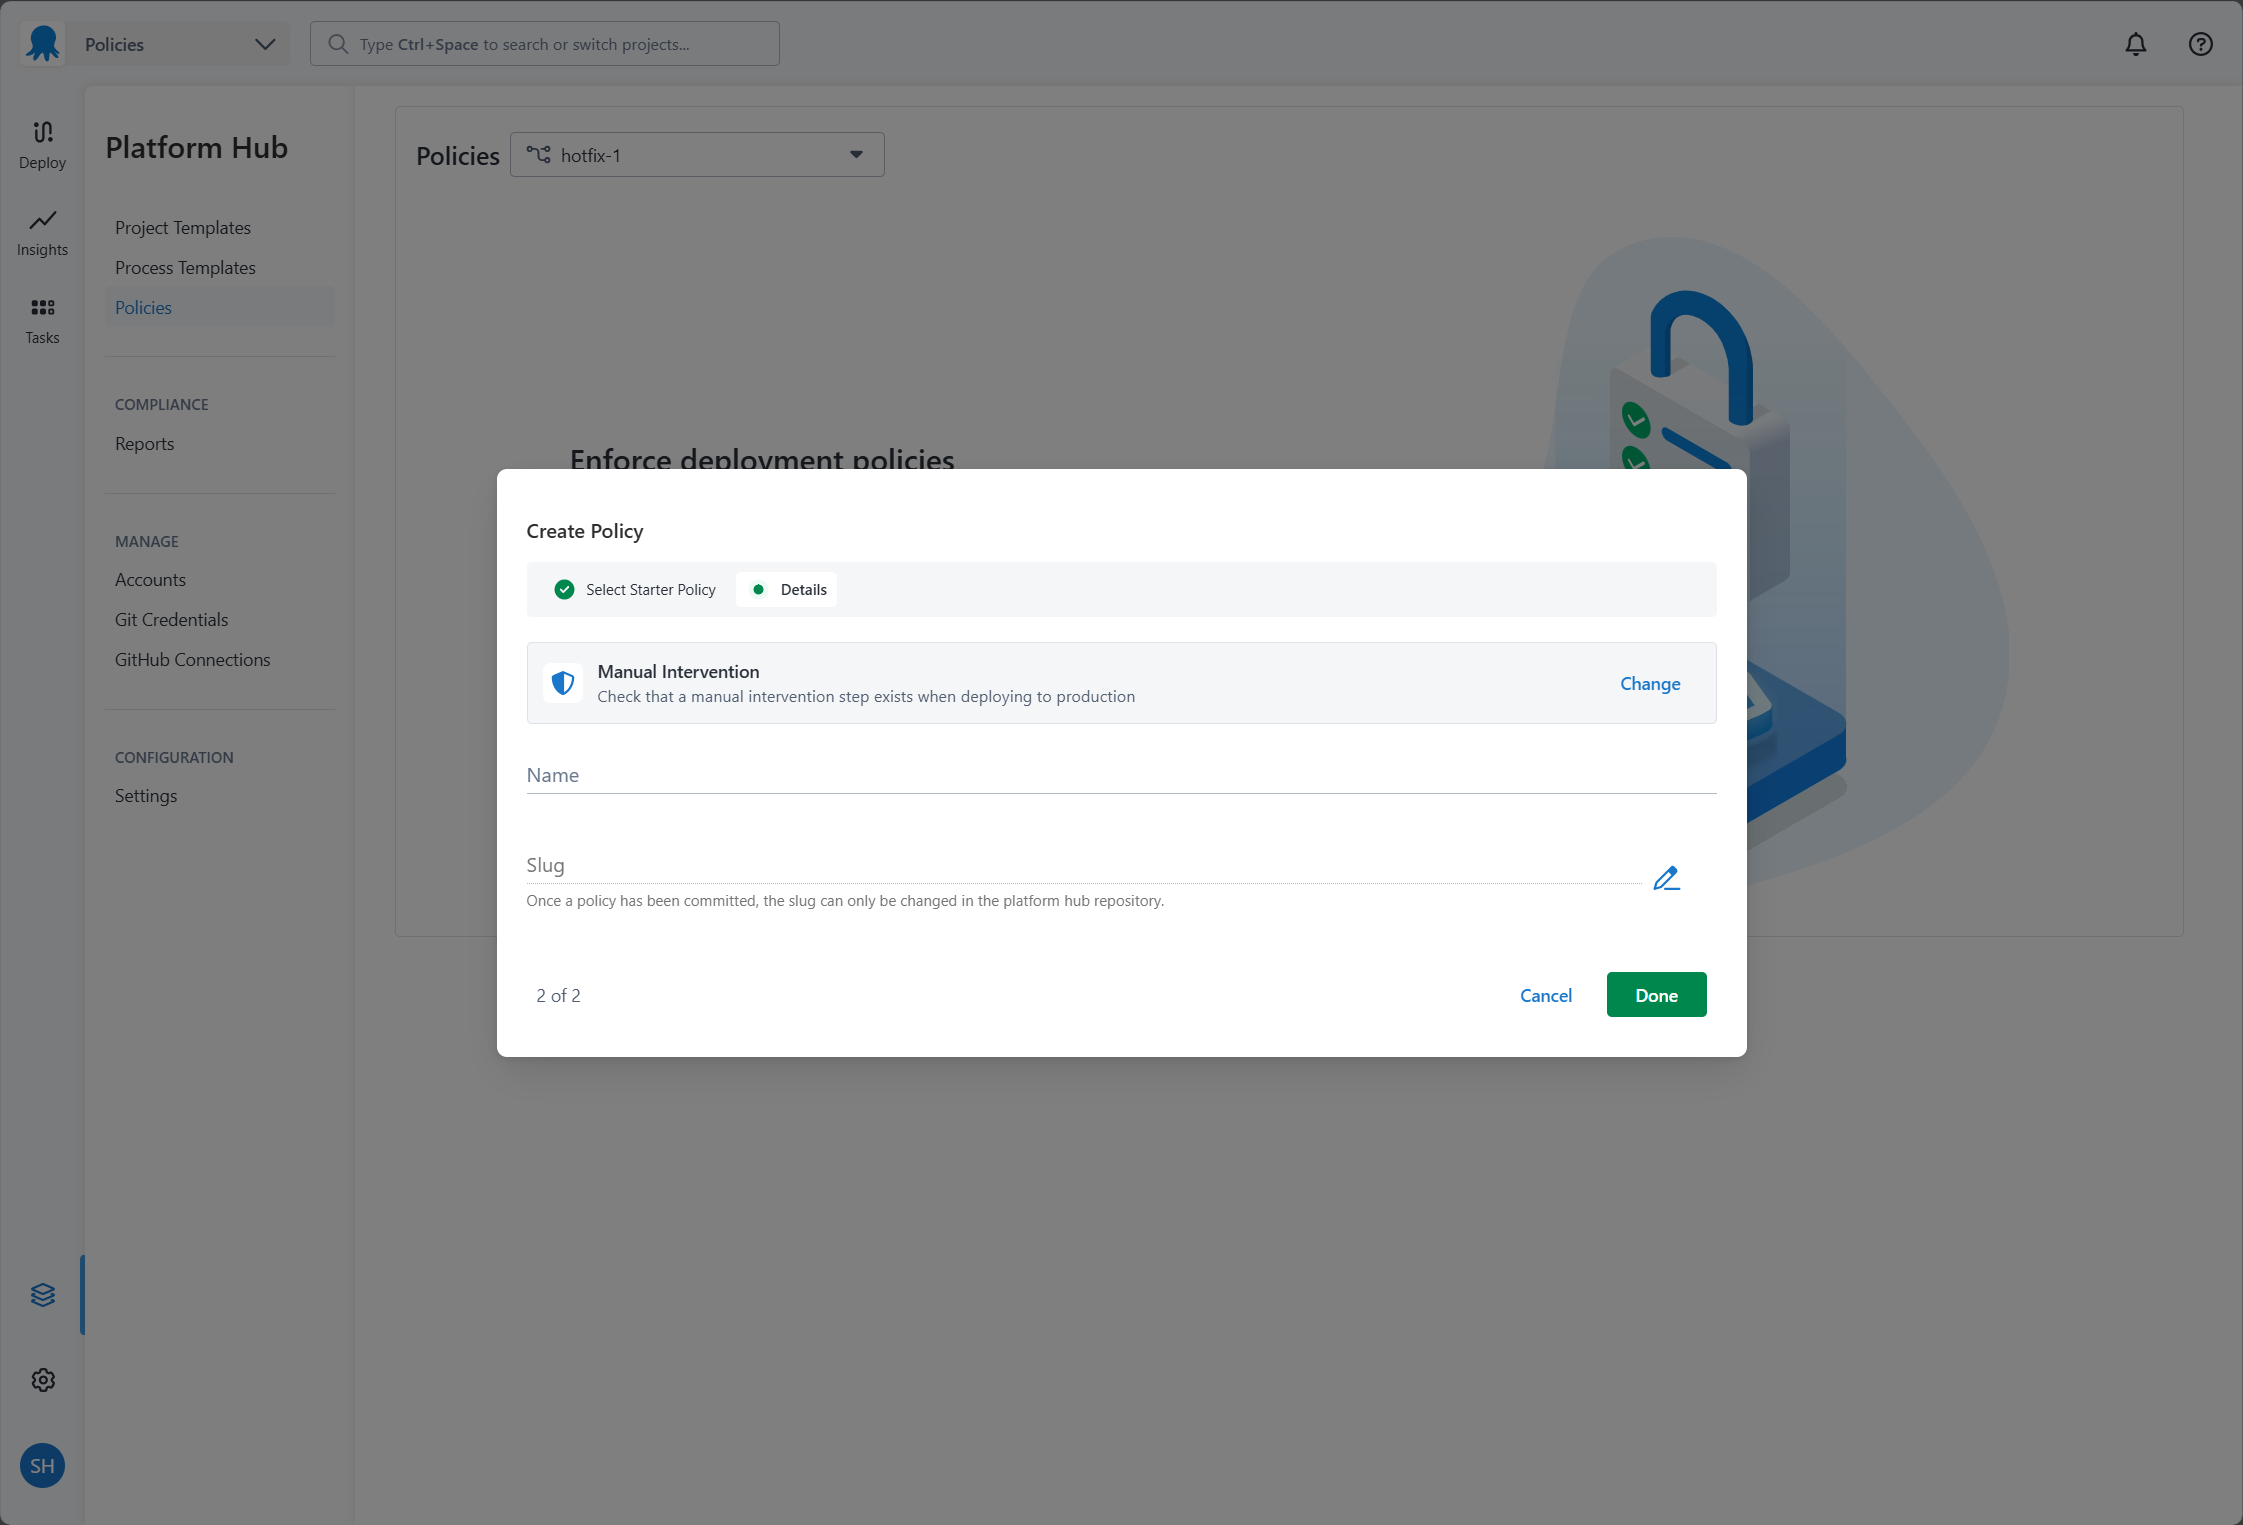
The slug can’t be changed after the policy is created. It becomes the package name in your Rego code and the filename of the OCL file in your repository.
4. Fill in the policy details
Fill in the following fields:
- Name: a short, memorable name for this policy.
- Description: an optional summary of what the policy enforces.
- Violation reason: the message shown to users when a deployment or runbook run fails this policy. Make this specific enough for users to understand what they need to fix.
- Violation action: whether a failing policy blocks the execution or raises a warning.
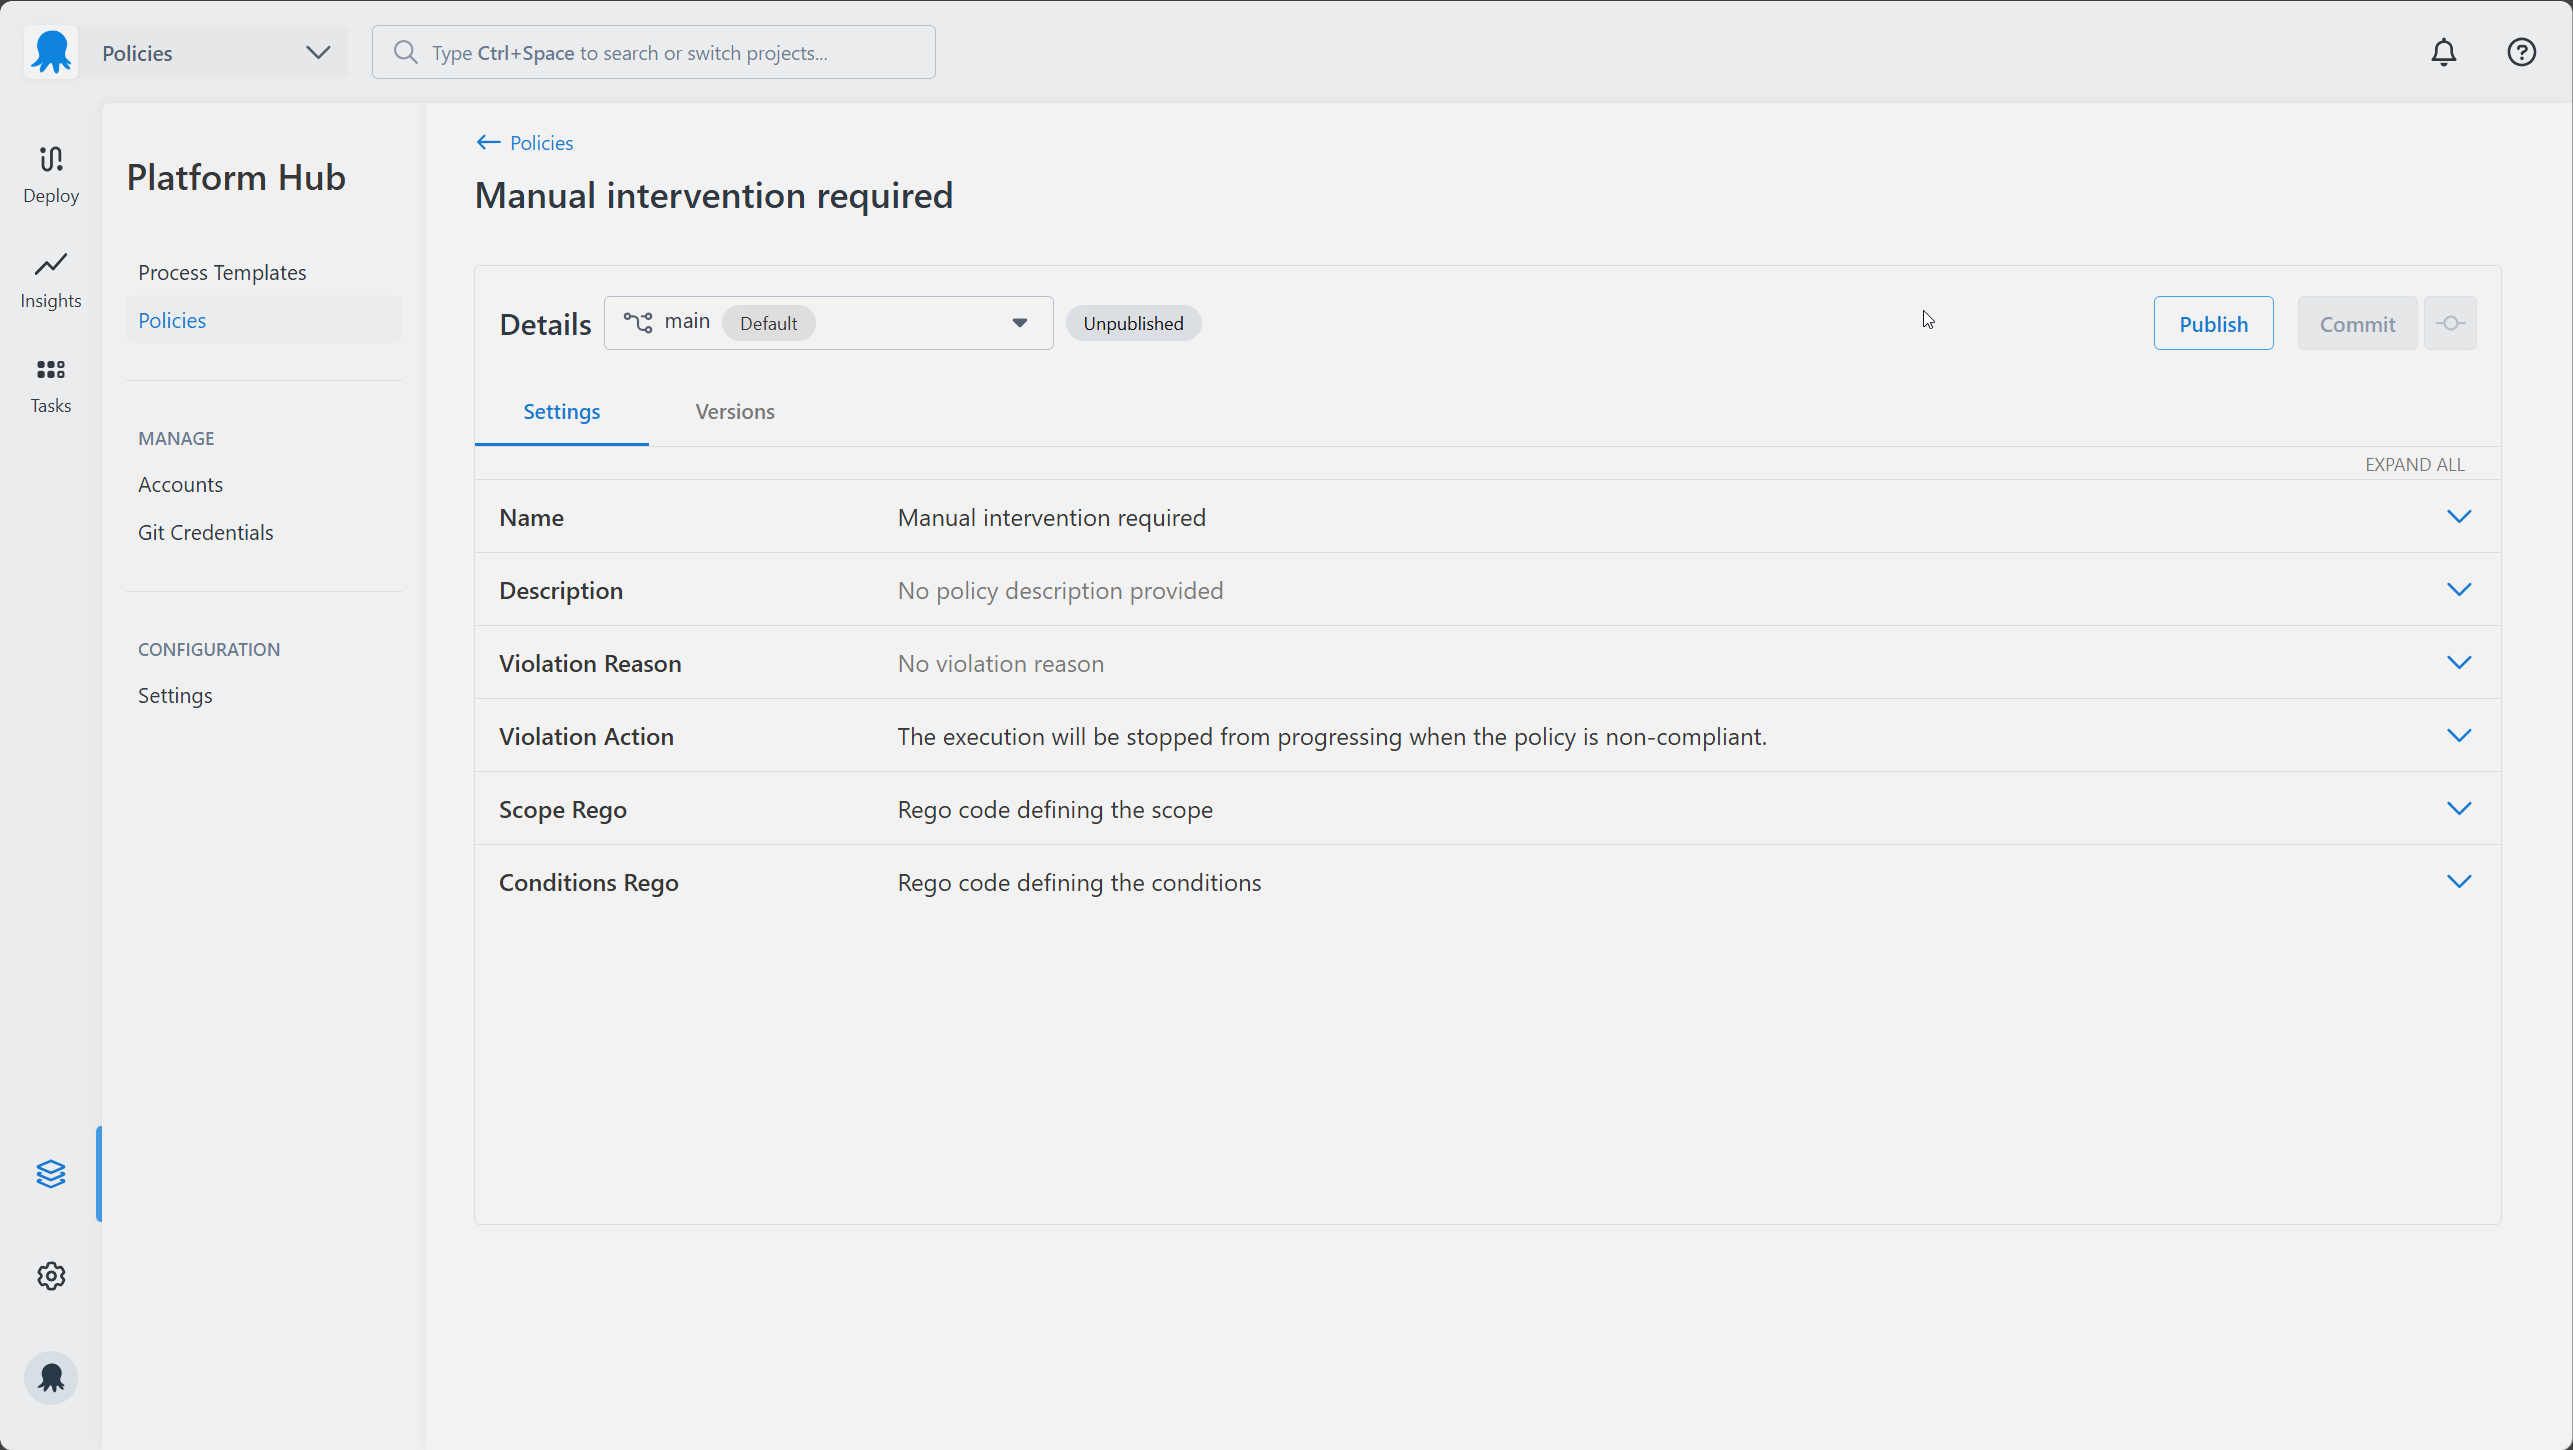
The values for both Violation Reason and Violation Action can be overridden by the reason and action properties returned in your conditions Rego result. See the output schema for details.
5. Write your scope
The Scope Rego determines which deployments and runbook runs this policy evaluates.
Octopus passes the input object for every execution to the policy engine. In your Rego, this is available as input. For example, the environment being deployed to looks like this:
{
    "Environment": {
        "Id": "Environments-1",
        "Name": "Development",
        "Slug": "development",
        "Tags": ["region/us-east"]
    }
}
Reference the environment name in Rego as follows:
input.Environment.Name == "Development"For our example, the policy only evaluates deployments going to the Development environment, for the ACME project, in the Default space. All three conditions must be true at once.
package manual_intervention_required

default evaluate := false

evaluate if {
    input.Environment.Name == "Development"
    input.Project.Name == "ACME"
    input.Space.Name == "Default"
}
The scope rule must be named evaluate. You can’t rename it. The package name must match your policy slug exactly.
For more scoping patterns, including scoping to tenants, project groups, or runbook runs only, see the scoping examples.
6. Write your conditions
The conditions define the rules a deployment or runbook run must meet. Octopus reads the result object your Rego returns to decide whether to allow or block the execution.
Start by setting the default result. Because we’re still testing this policy, set the action to warn rather than block. A warning lets the execution proceed but records the violation in the task log, dashboard, and audit log, so you can confirm the policy is evaluating correctly without risking broken deployments.
The result rule must be named result. You can’t rename it. The package name must match your policy slug exactly.
package manual_intervention_required

default result := {"allowed": false, "action": "warn"}
Then add a rule that sets result to allowed when the conditions are met. In this example, the deployment must contain at least one manual intervention step:
package manual_intervention_required

default result := {"allowed": false, "action": "warn"}

result := {"allowed": true} if {
    some step in input.Steps
    step.ActionType == "Octopus.Manual"
}
For the full list of input fields you can reference in your conditions, see the schema for policies.
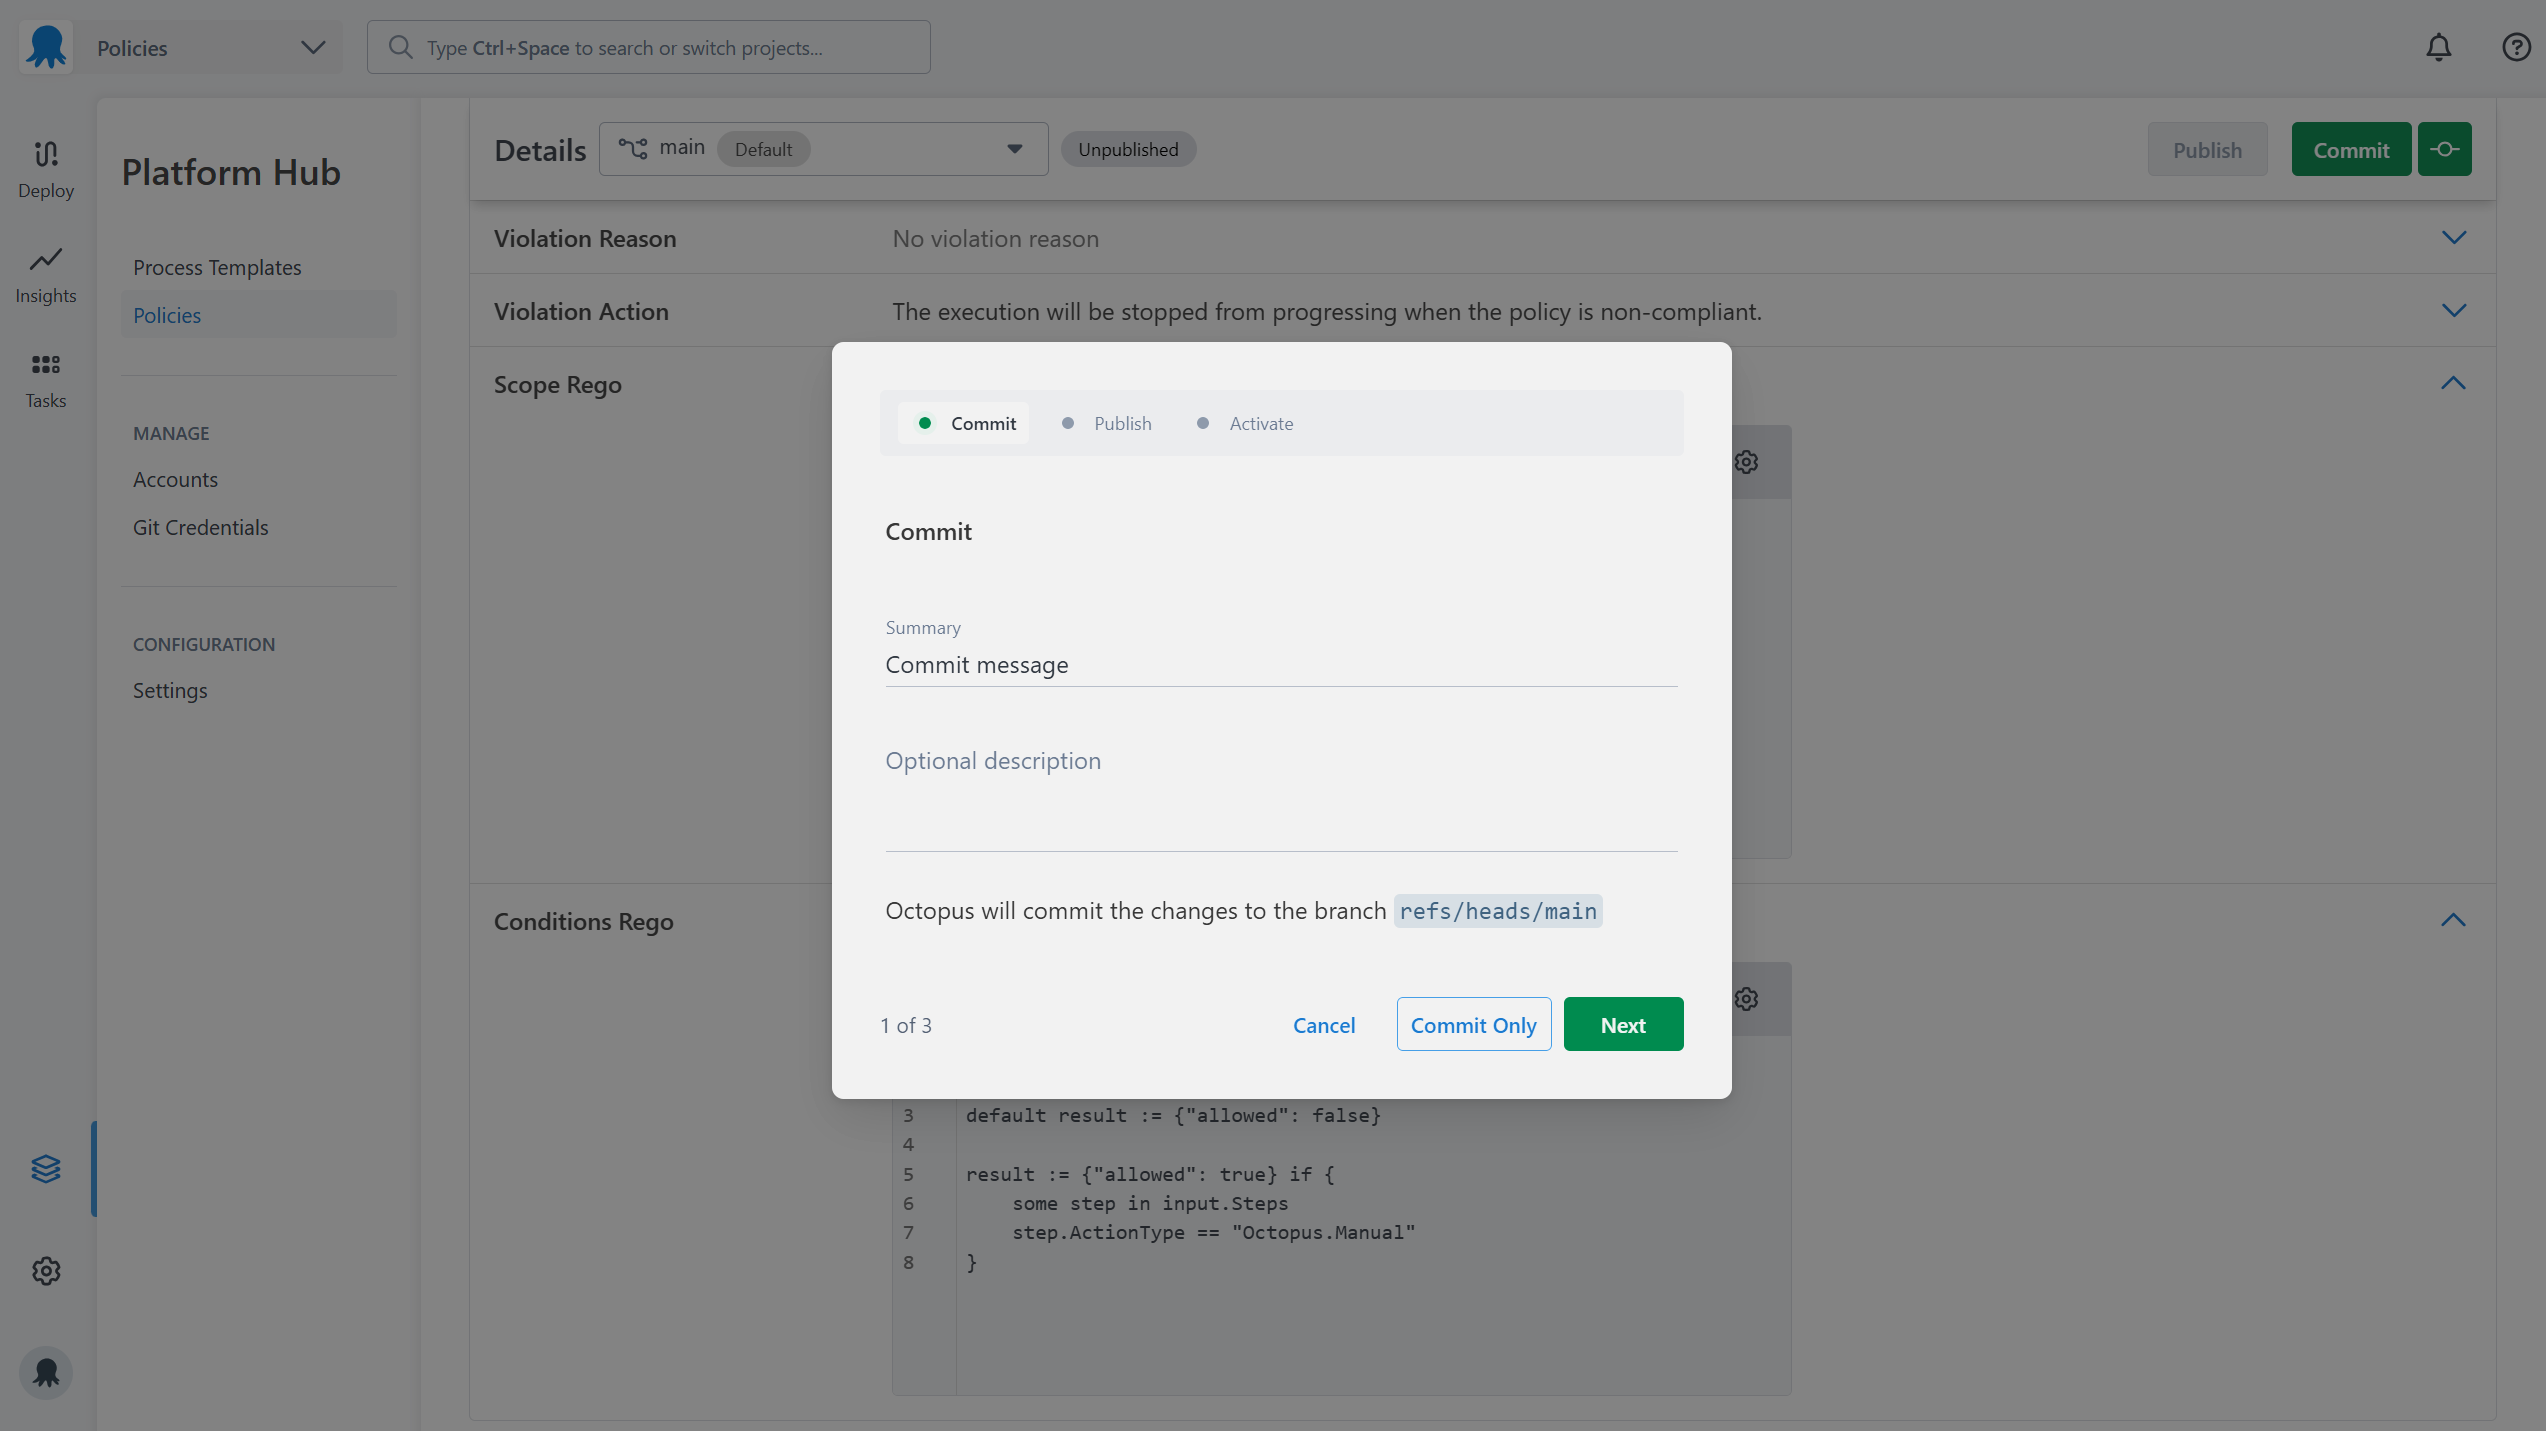
7. Save your policy
Once you’ve finished writing your Rego, commit your changes to save them to your Git repository. You can commit with a description or use quick commit without one.
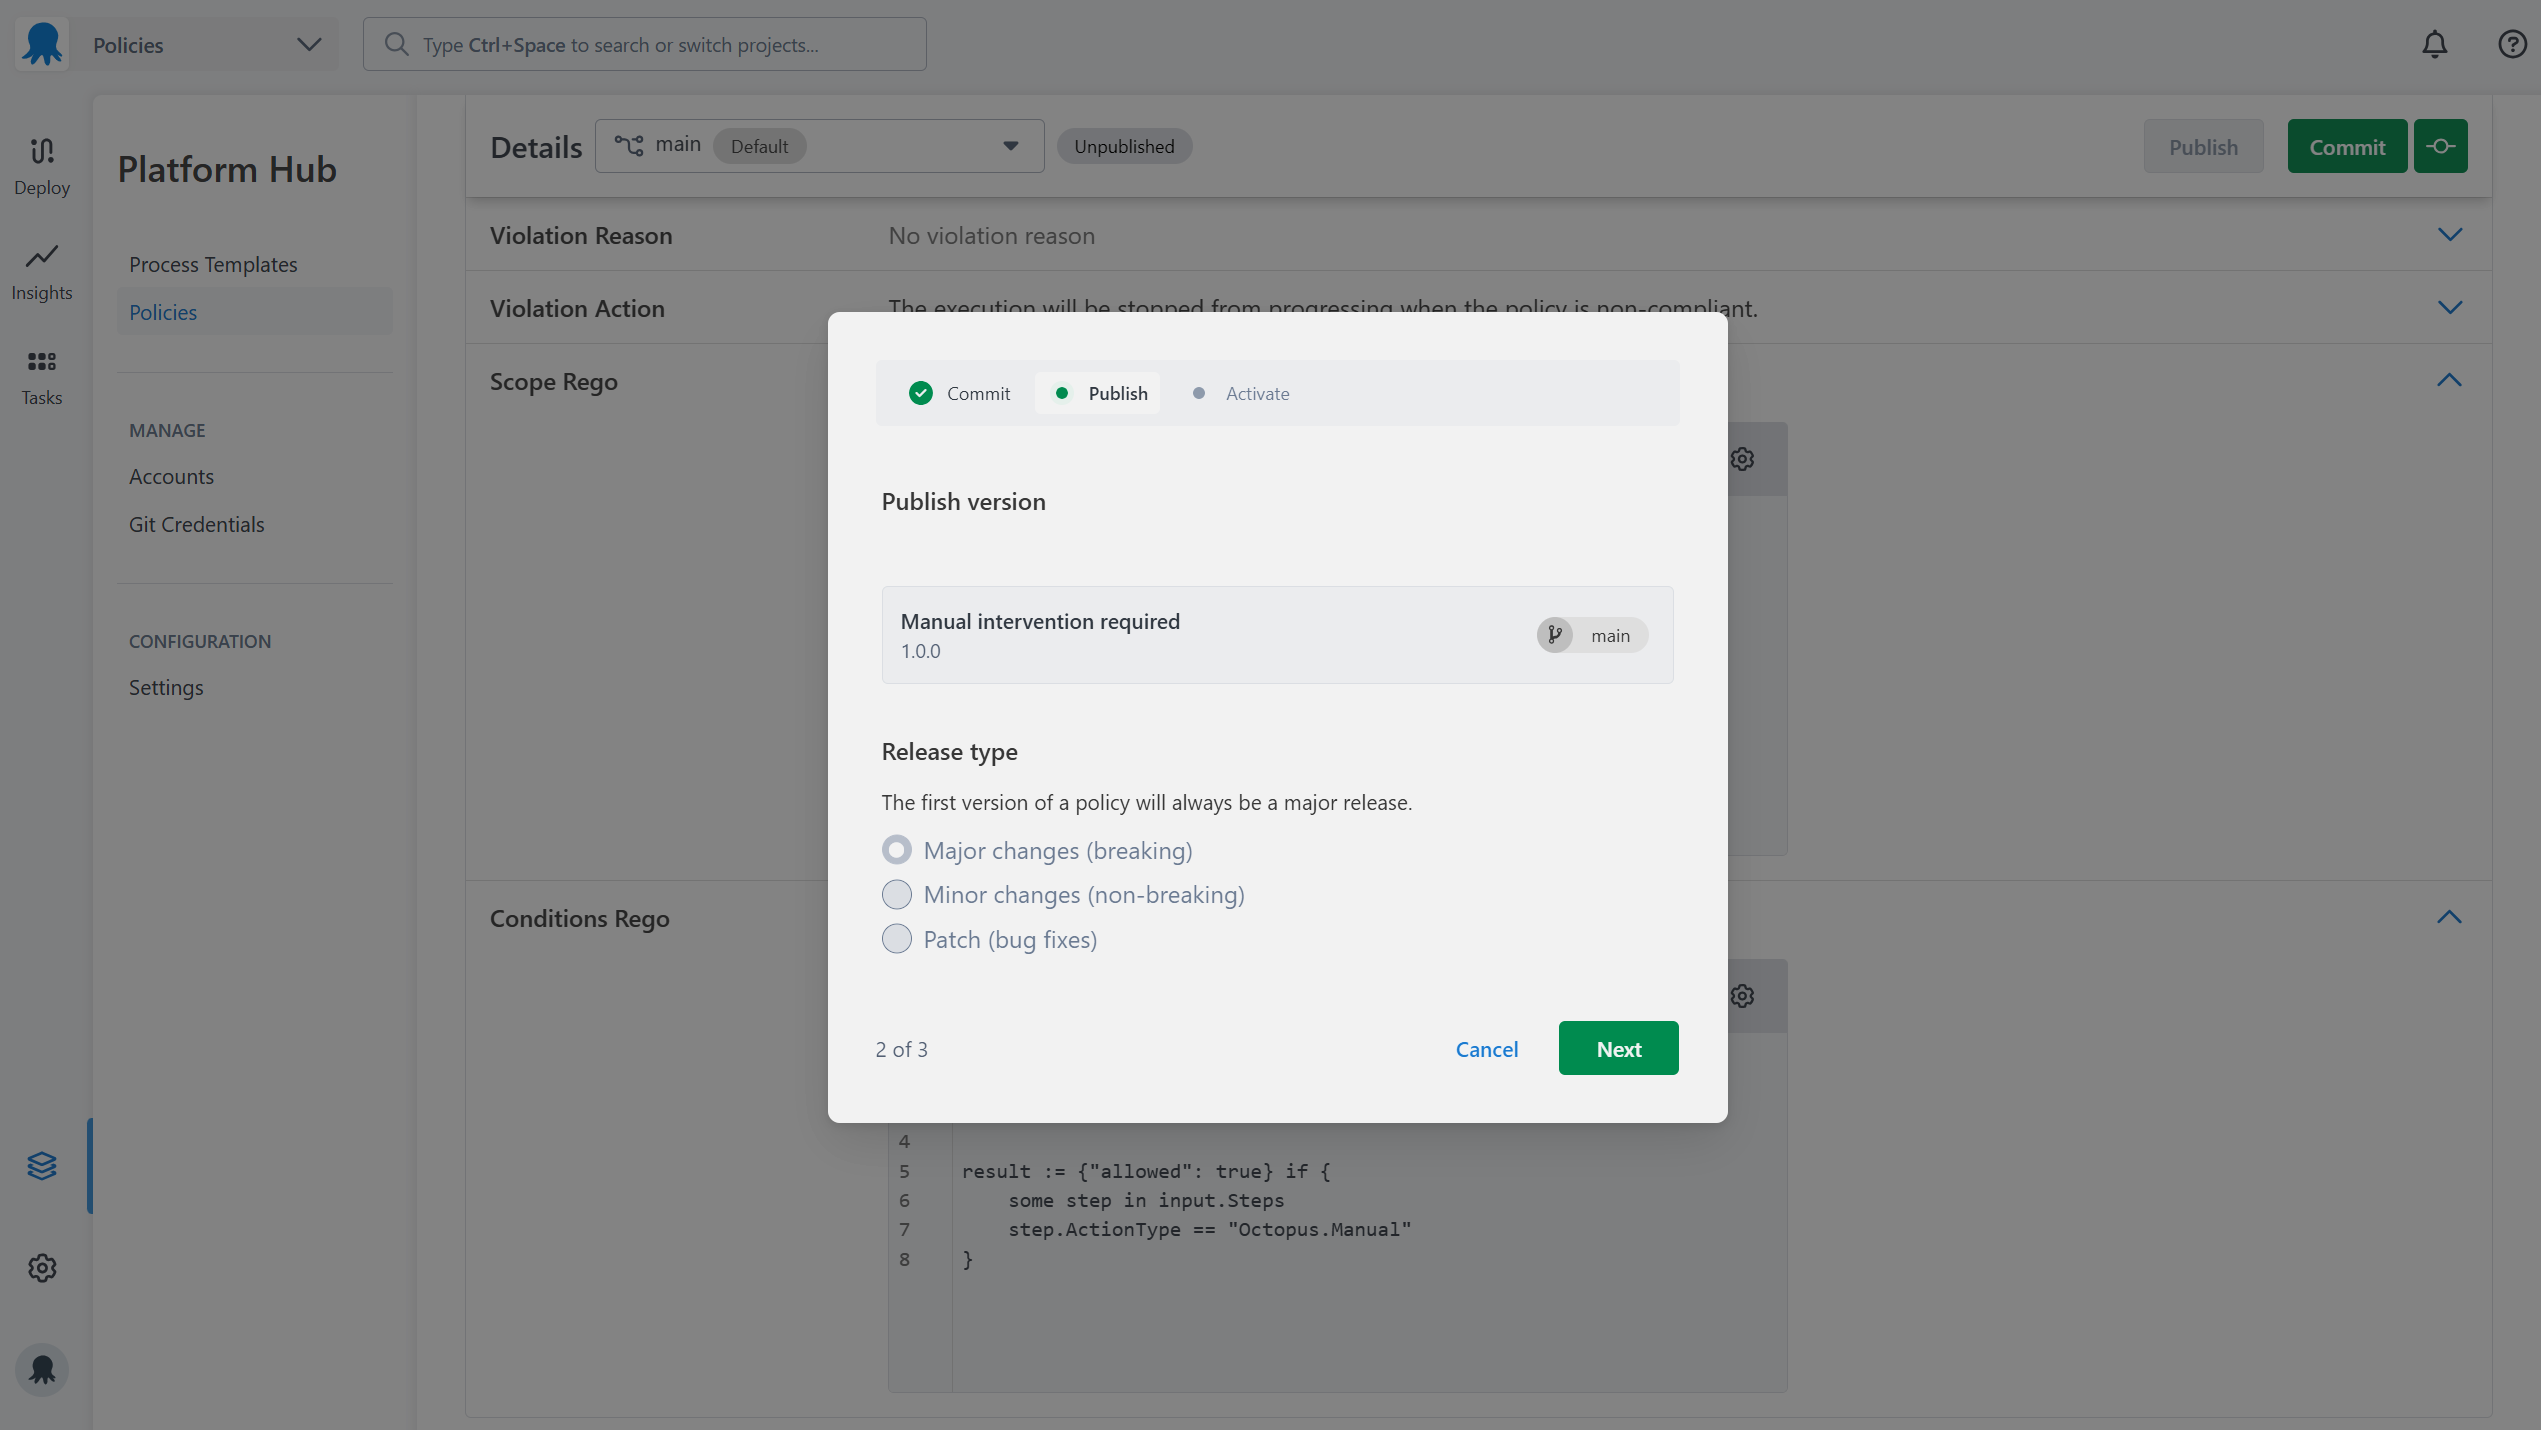
8. Publish your policy
After committing, publish the policy to make the changes take effect. Choose the appropriate version type:
- Major: breaking changes
- Minor: non-breaking changes
- Patch: bug fixes
The first time you publish a policy, you can only publish a major version.
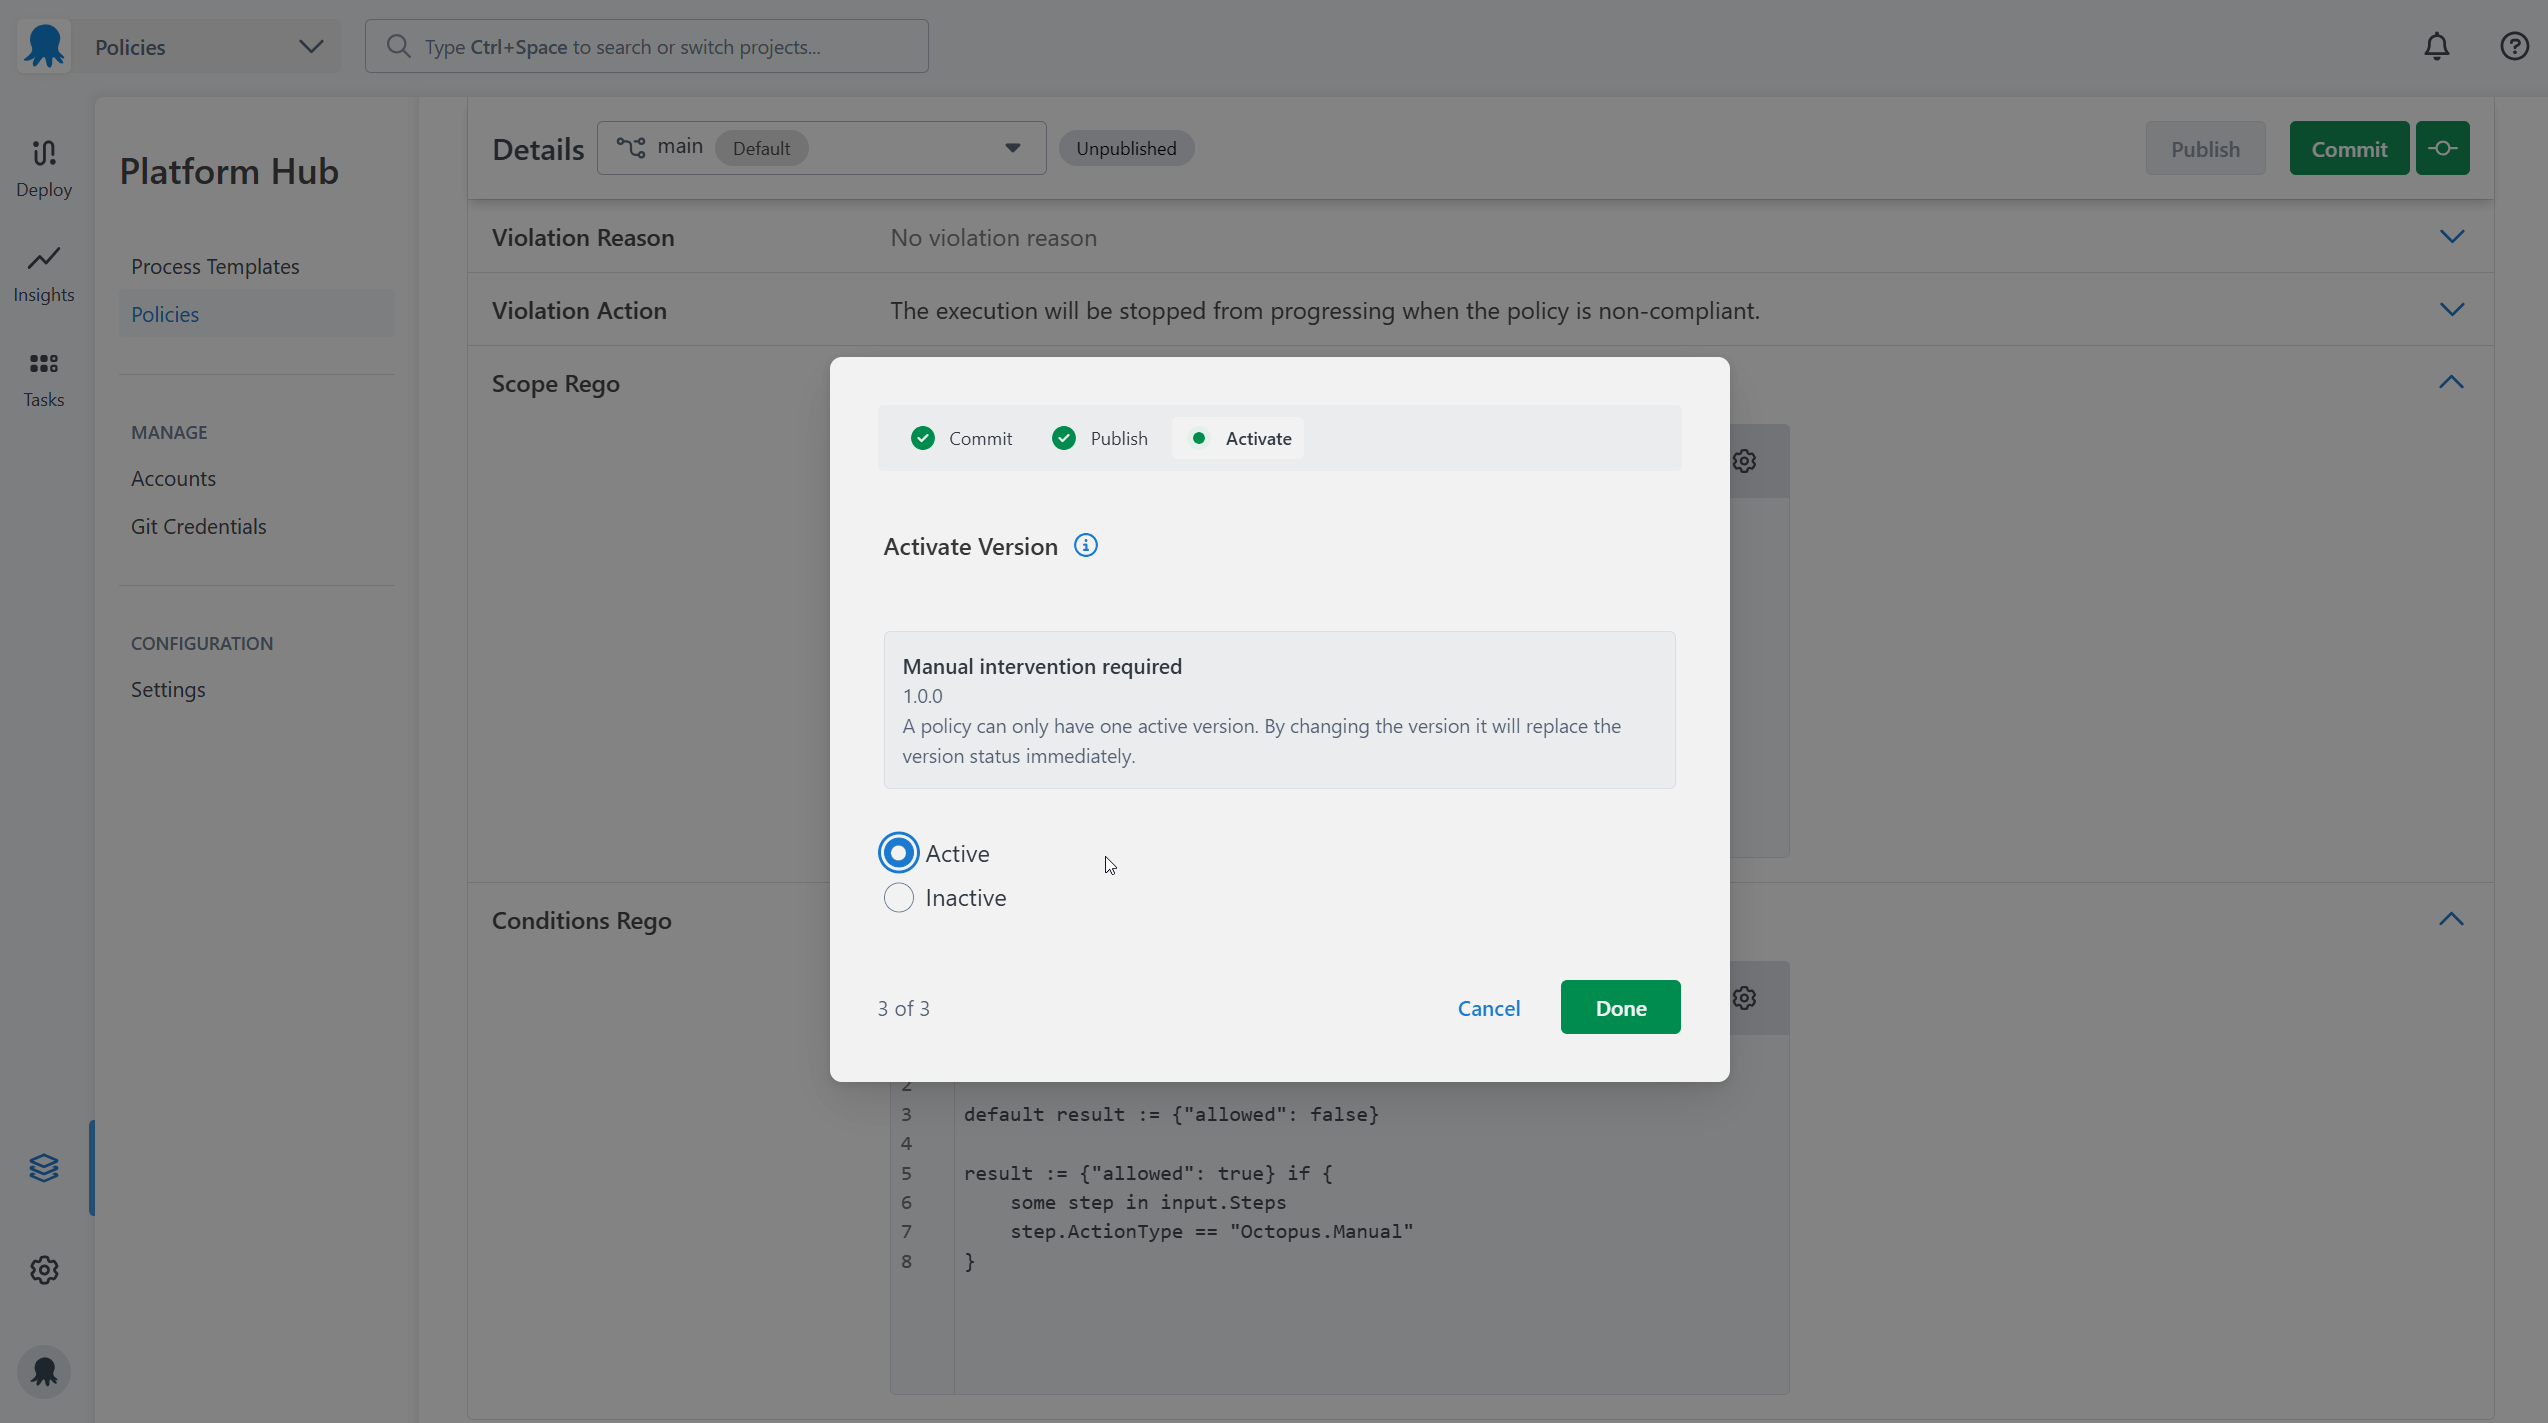
9. Activate your policy
Published policies must be activated before Octopus evaluates them. You can deactivate a policy at any time to stop it from being evaluated without deleting it.
Activation settings can be updated at any time from the Versions tab on the edit policy page.
10. Test your policy
With the policy active, trigger a deployment to the Development environment for the ACME project. Because the violation action is set to warn, the deployment will proceed regardless. If the manual intervention step is missing, Octopus records the violation in the task log and project dashboard. Check both to confirm the policy is evaluating as expected.
All policy evaluations appear in the audit log under Configuration > Audit, filtered by the Compliance Policy Evaluated event group. Audit log entries and server tasks only appear for executions in the policy’s scope.
To see the full input object that was passed to the policy engine for a specific execution, turn on the verbose option in the task log. This is useful for checking whether a policy is evaluating the right fields.
Once you’re satisfied the policy is working correctly, you can:
- Change
"action": "warn"to"action": "block"in your conditions Rego. - Update the scope to include your production environment.
- Commit, publish, and re-activate the policy.
See Troubleshooting policies if evaluations aren’t appearing as expected.
Help us continuously improve
Please let us know if you have any feedback about this page.
Page updated on Thursday, September 11, 2025