This page covers the practices that will save you time and prevent problems as you build and roll out policies across your organization. If you’re writing your first policy, start with the getting started guide first.
Naming your policies
A consistent naming standard makes it easy for everyone to understand what a policy does and when it runs, without having to open it.
Use the format [Scope] - [Policy name], where the scope prefix reflects what type of execution the policy applies to:
| Scope prefix | Use when |
|---|---|
| Deploy | The policy only applies to deployments |
| Run | The policy only applies to runbook runs |
| Global | The policy applies to both |
For example: Deploy - Manual intervention required or Run - Main branch only.
Use warn before block
Every new policy should start with "action": "warn" in the default result. A warning lets the execution proceed but records the violation in the task log, dashboard, and audit log. This gives you a chance to verify the policy is evaluating the right executions before it starts blocking anyone.
Once you’ve confirmed the policy is working as expected, switch to "action": "block".
# Start here while testing
default result := {"allowed": false, "action": "warn"}

# Switch to this once confirmed
default result := {"allowed": false, "action": "block"}
You can also use the action field in individual rules to block in production while warning elsewhere. See the block in production, warn elsewhere example.
Start narrow, then broaden
When you create a new policy, limit its scope as tightly as possible:
- Start with a single project and execution type. For example, scope to one project and deployments only. This limits the blast radius if the policy behaves unexpectedly.
- Extend to more projects or tenants once you’re confident the policy is correct.
- Extend to project groups or spaces once you’re satisfied with behaviour across multiple projects.
This progression also gives teams time to fix violations before the policy scope reaches them, rather than discovering a blocked deployment with no warning.
Write a clear violation reason
A policy violation is often the first time a user encounters the policies feature. The violation reason is the message they see when a deployment or runbook run fails. Make it specific enough for them to understand what’s wrong and what to do about it.
Avoid generic messages like “Policy violation” or “Deployment blocked”. Instead, explain what was expected:
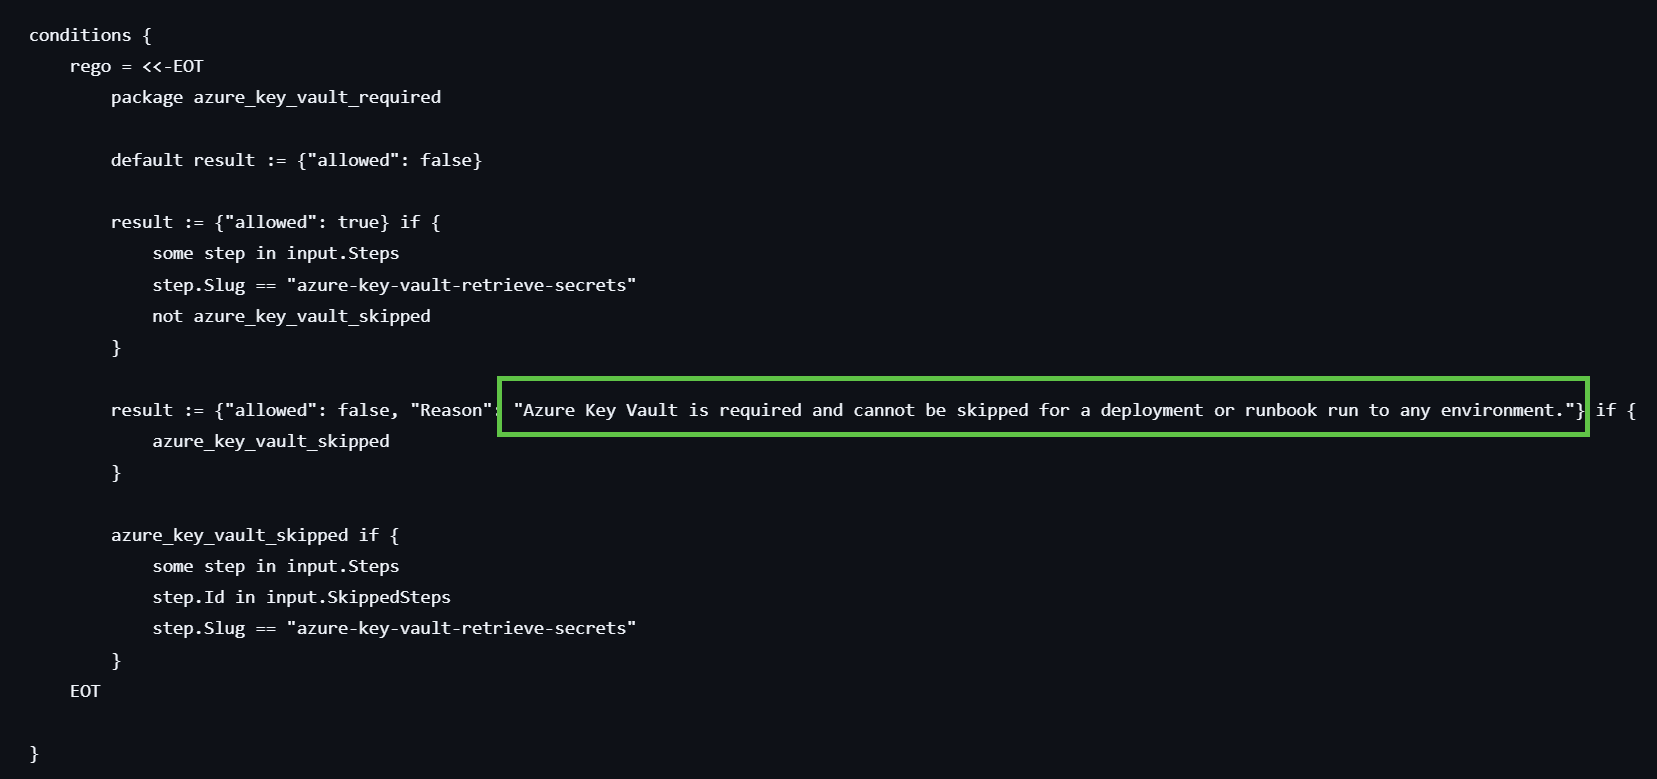
You can set a default violation reason in the policy UI, and override it per rule using the reason property in your conditions Rego:
result := {"allowed": false, "reason": "A manual intervention step is required and cannot be skipped in this environment"} if {
    manual_intervention_skipped
}
Check for existence, skipping, and run conditions
It’s not enough to check that a required step exists in the process. Users can skip steps when scheduling a deployment or runbook run, even if the step is present. Users can also configure a step to only run based on certain conditions (scoped to environment, tenant, etc.).
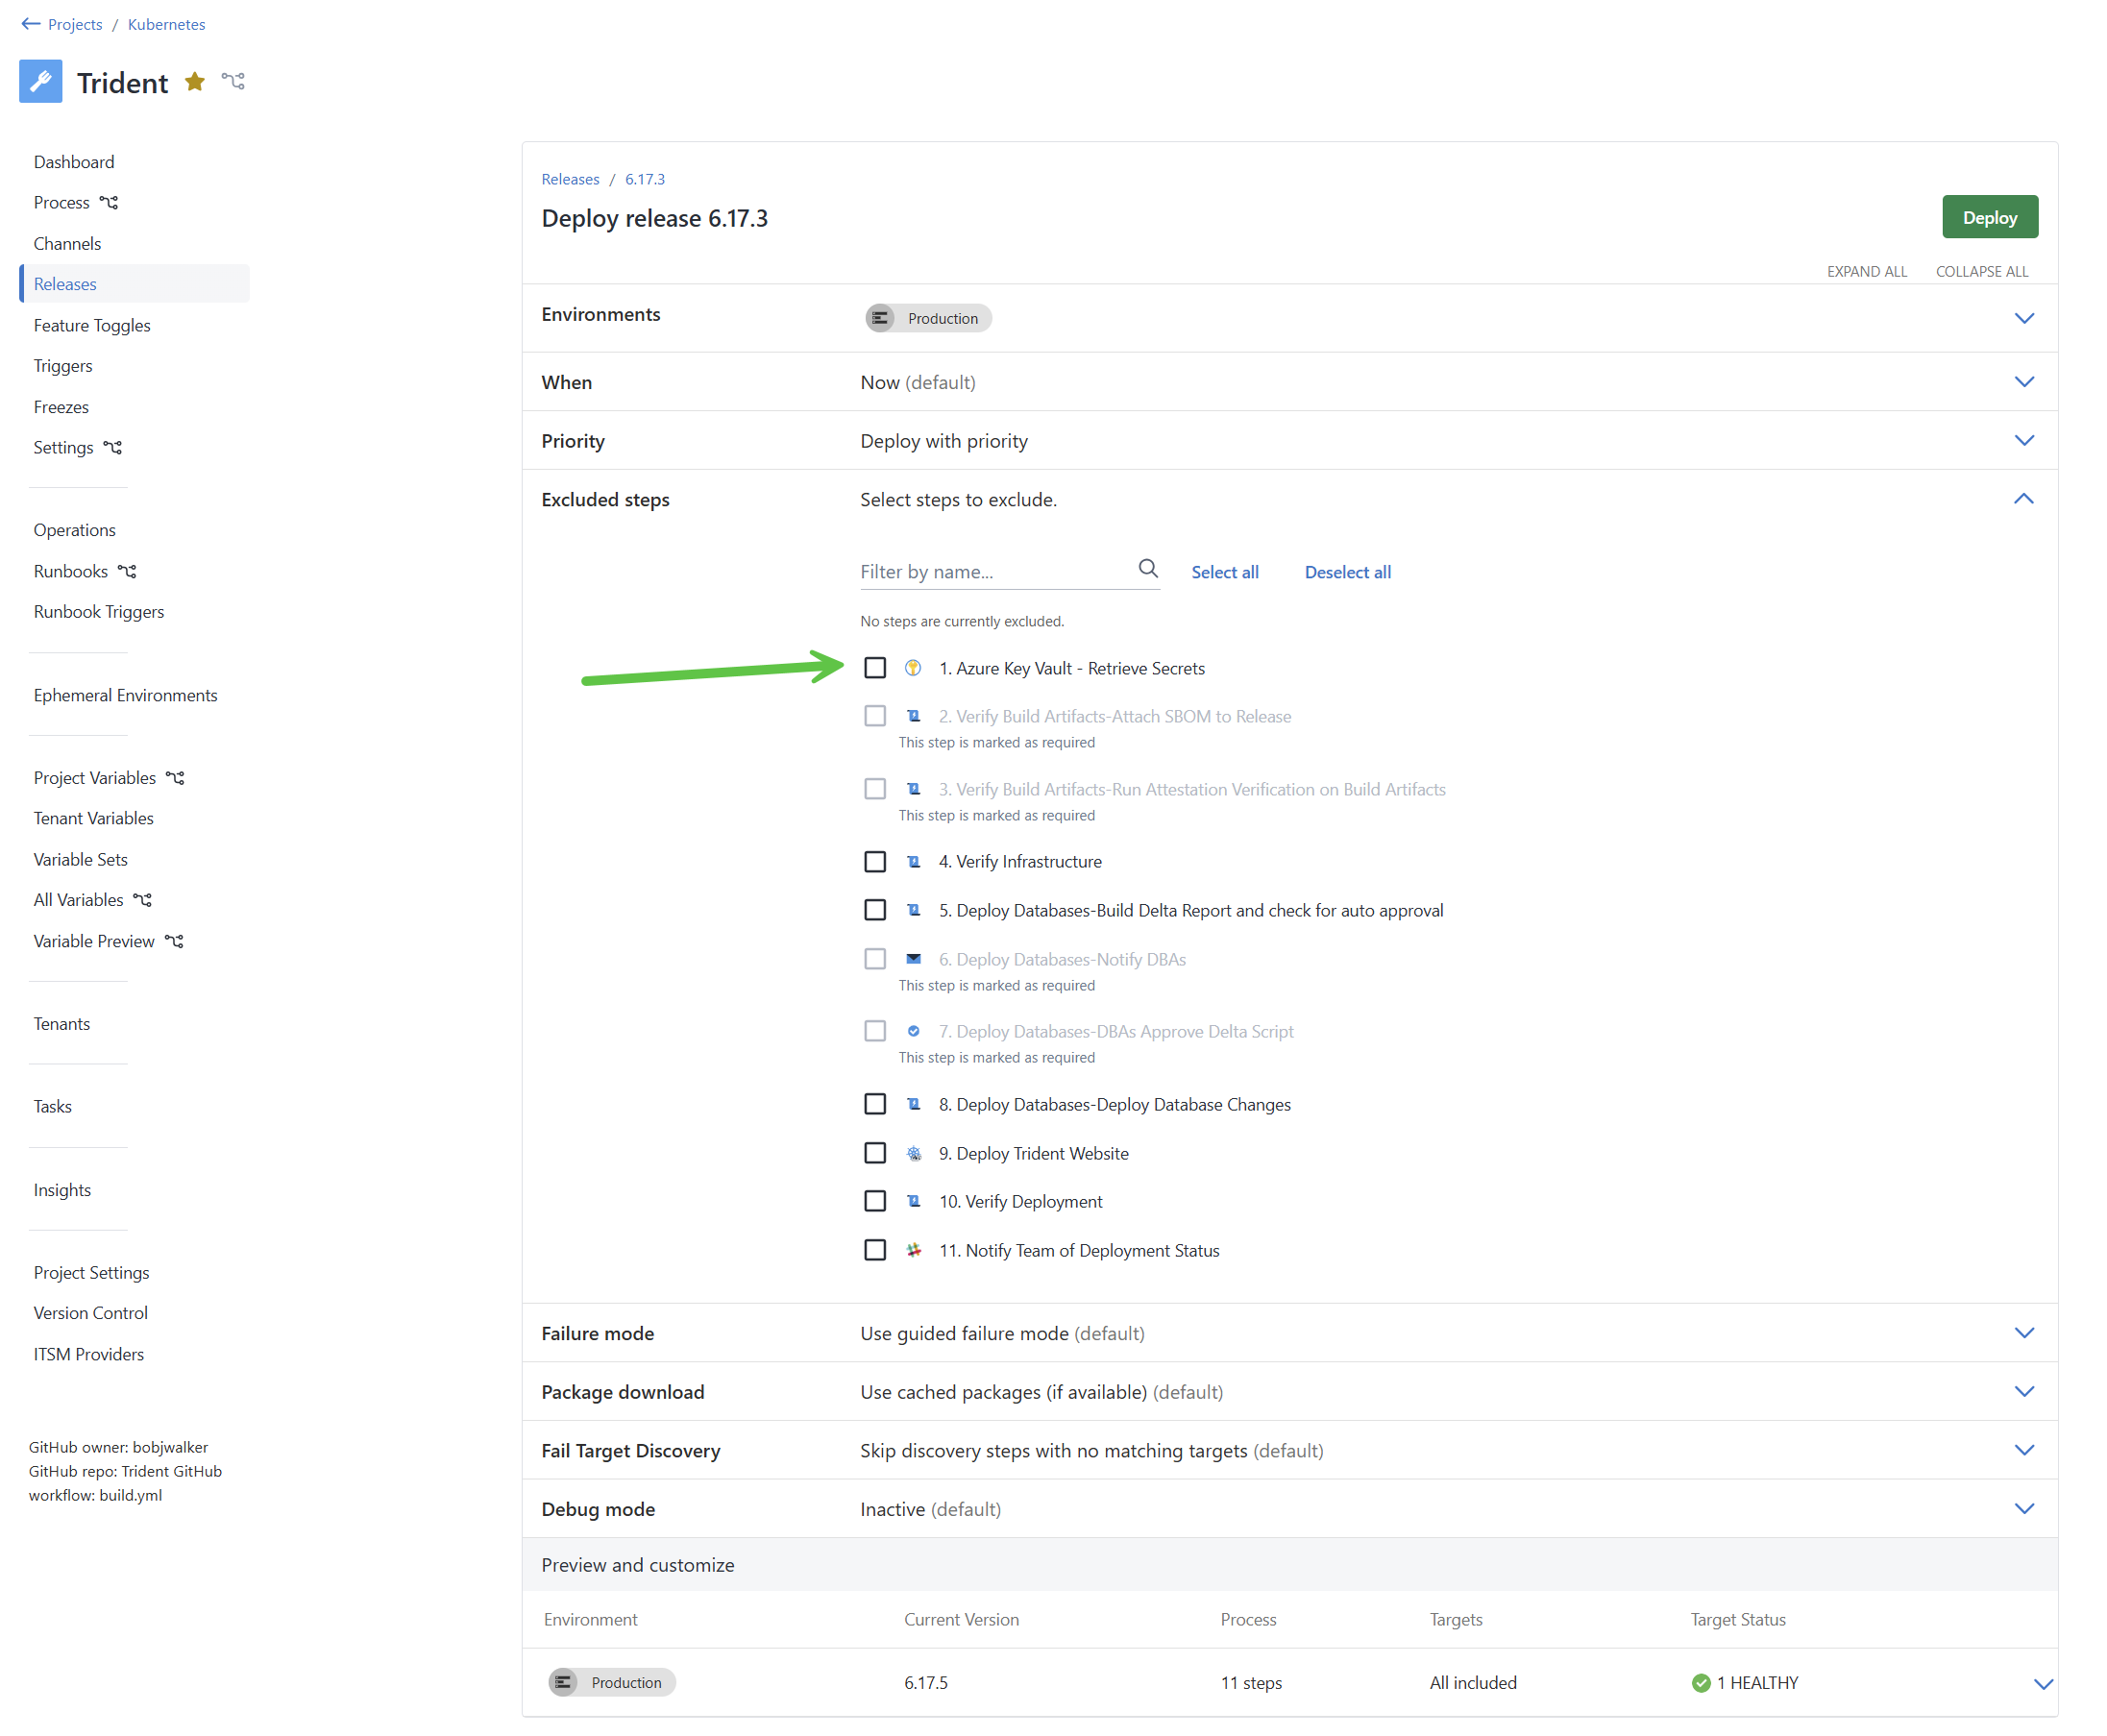
Your policy conditions should check that the step is present, that it hasn’t been skipped and is not conditional:
result := {"allowed": true} if {
    some step in input.Steps
    step.Source.SlugOrId == "<step-slug>"
    not step.Id in input.SkippedSteps
    step.Enabled == true
    step.IsConditional == false
}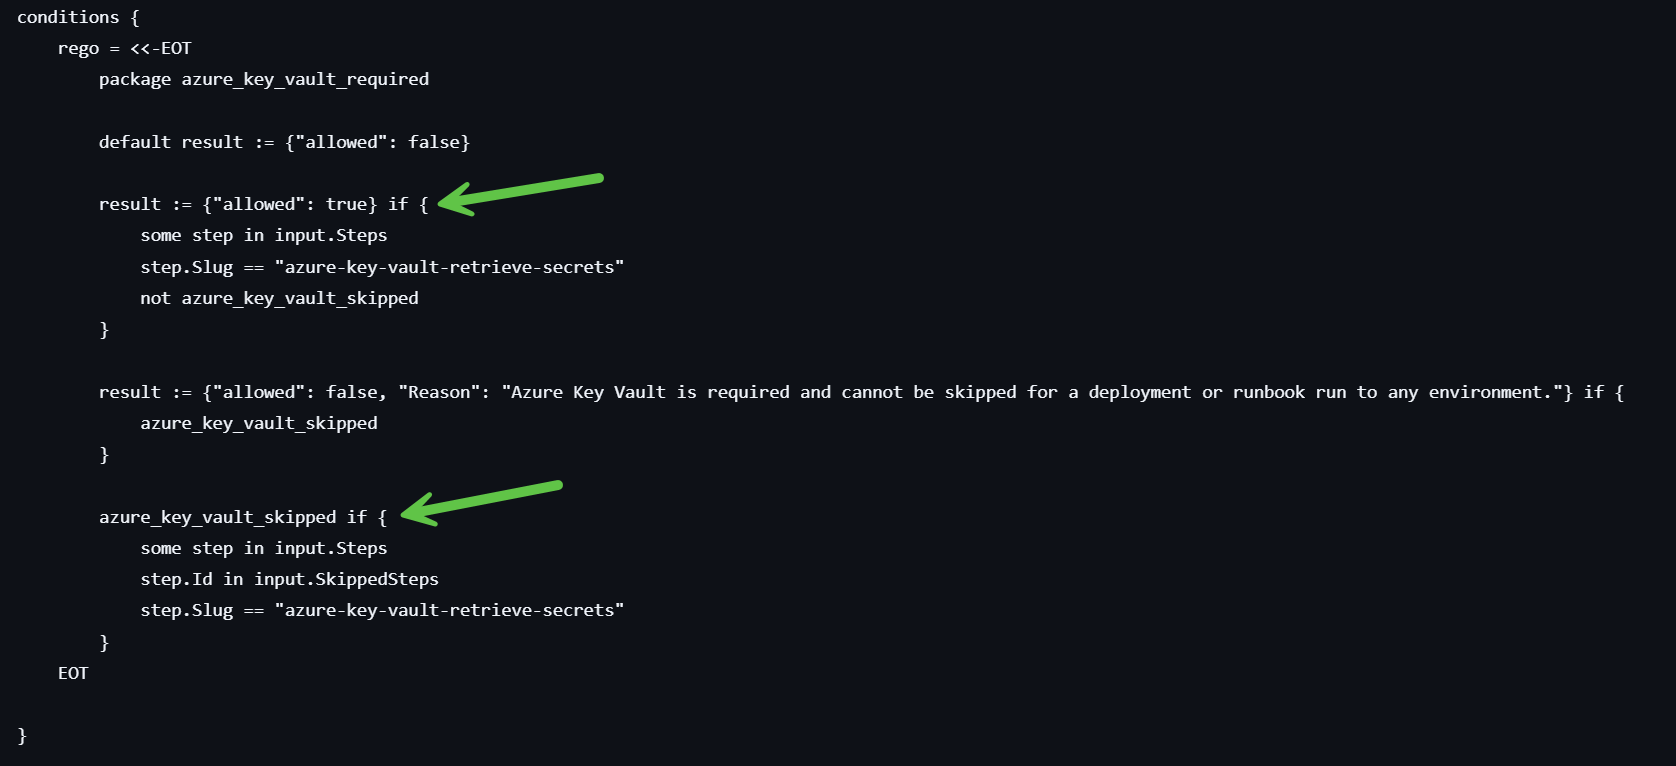
See the steps and skipping examples for complete patterns.
Guard against conditional fields
Three input fields are not always present in the input object: Tenant, Release, and Runbook. Referencing them without checking for their existence first will cause a policy evaluation error. See schema for policies for the full list of available fields.
| Field | When it’s present |
|---|---|
| Tenant | Tenanted deployments only |
| Release | Deployments only |
| Runbook | Runbook runs only |
Always guard against their absence in your scope or conditions:
# Safe: check Runbook exists before accessing its properties
evaluate if {
    input.Runbook
    input.Runbook.Id == "<runbook-id>"
}

# Unsafe: will error if Runbook is absent
evaluate if {
    input.Runbook.Id == "<runbook-id>"
}
The simplest way to avoid this is to scope your policy to deployments only or runbook runs only when the policy is specific to one type. See the scoping examples.
Check for parallel execution
Steps can be configured to run in parallel or sequentially. If your organization requires sequential execution for compliance or audit purposes, add a policy to enforce it.
Each item in the Execution input field has a StartTrigger property with one of two values:
StartAfterPrevious: the step runs after the previous step completesStartWithPrevious: the step runs at the same time as the previous step
To enforce sequential execution:
result := {"allowed": true} if {
    every execution in input.Execution {
        execution.StartTrigger != "StartWithPrevious"
    }
}
See the prevent parallel execution example for the complete policy.
Stream evaluations to your SIEM
All policy evaluations are recorded in the Octopus audit log. If your organization uses a SIEM tool such as Splunk, Sumo Logic, or an OpenTelemetry collector, set up audit log streaming to forward those records automatically.
This gives your security team visibility into policy violations across your entire Octopus instance, and lets you build dashboards and alerts that match your compliance requirements.
Testing your policy
Before extending a policy’s scope or switching from warn to block, verify it’s evaluating correctly:
- Run a deployment or runbook run that should fail the policy. Confirm the violation appears in the task log and project dashboard.
- Run a deployment or runbook run that should pass the policy. Confirm it proceeds without a violation.
- Check the audit log under Configuration > Audit, filtered by Compliance Policy Evaluated, to see the full evaluation history.
To see the exact input object that was passed to the policy engine for a specific execution, turn on the verbose option in the task log. This is useful when a policy isn’t evaluating as expected. See Troubleshooting policies for more detail.
Help us continuously improve
Please let us know if you have any feedback about this page.
Page updated on Thursday, September 25, 2025